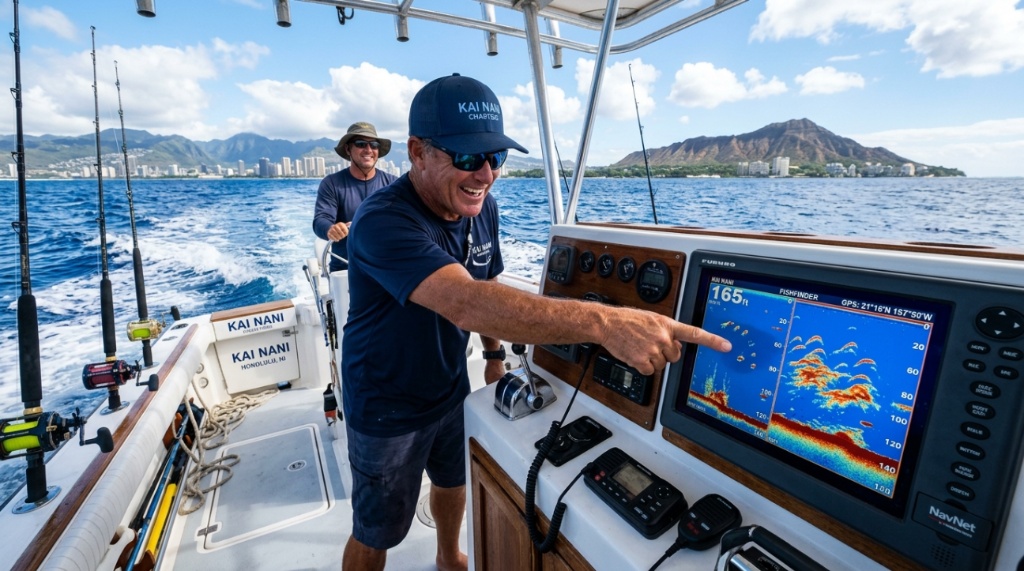
If you’ve ever fished Hawaiian waters, you know the struggle. The Pacific around Maui, Oahu, and the Big Island is deceptively beautiful—crystal clear, warm, and seemingly full of life. Yet, you can drift for hours without a single bite while the boat 200 yards away is hauling in ono. The difference isn’t luck. It’s knowing what’s beneath the surface. The ocean here drops off dramatically, structure changes within feet, and fish often hold tight to ledges that are impossible to see from above. That’s where Hawaii sonar fishing changes everything. This isn’t about just finding deep water; it’s about deciphering the unique underwater topography of volcanic islands to pinpoint exactly where the fish are holding. In this guide, we’ll break down how to use sonar effectively in Hawaii, what settings actually matter, and how to interpret what your screen is telling you so you can stop guessing and start catching.
Key Takeaways
- Hawaii’s steep drop-offs and volcanic rock formations require adjusting your sonar cone angle and gain settings far differently than mainland flats or lakes.
- Don’t just look for “arches”—in Hawaii, you’re often targeting fish hugging tight to the bottom structure, which requires reading discontinuities in the substrate.
- Understanding the difference between 2D sonar, DownScan, and SideScan is critical for covering deep water quickly and thoroughly.
- Matching your sonar frequency to water depth and target species (like bottomfish vs. pelagics) is the most overlooked factor for success in the islands.
Why Standard Sonar Settings Fail in Hawaii
Most anglers come to Hawaii with their fish finder set up from their home waters—usually a shallow lake or a gentle coastal shelf. In Hawaii, the bottom often drops from 50 feet to 400 feet within a single boat length. This dramatic bathymetry is a nightmare for an incorrectly configured unit. If your auto-settings are on, your sonar is likely pinging at a lower frequency to cover more width, but in deep water, this spreads the signal too thin. The result is a cluttered, unreadable screen where bottom structure and fish marks blur together. You need to take manual control of your unit to isolate the specific depth band where the fish are feeding.
For effective Hawaii sonar fishing, start by setting a manual depth range just slightly deeper than the water you’re currently over. If you are drift fishing at 180 feet, set the range to 200 feet. This “zoom” feature expands the return on the bottom 20% of the screen, making it easier to see fish that are hugging the rocks. The biggest mistake is leaving the unit on “Auto” and watching the entire water column compress into a tiny 200-foot-tall section on a 5-inch screen, rendering a 10-inch fish completely invisible.
Interpreting the Volcanic Bottom
In Hawaii, you aren’t just looking for “structure”—you’re looking for specific types of volcanic rock. A smooth, sandy bottom is often a dead zone. The fish here want hard bottom: basalt ledges, boulder fields, and coral heads. On your 2D sonar, a sandy bottom appears as a clean, solid, thin line. A rocky volcanic bottom, however, appears as a thick, jagged line with multiple “echoes” or repeat returns below the main bottom line. This shadow effect indicates hard, complex substrate where bottomfish like ehu, onaga, and opakapaka thrive.
Reading Hard vs. Soft Bottom Returns
Pay close attention to the intensity of the bottom return. If the bottom line is bright red and thick, you are over hard rock. If it is thin and yellow or blue, you are over sand or mud. When you mark a transition zone—where the bottom suddenly changes from hard to soft—slow down. These transition lines are highways for predators hunting crustaceans that move between substrates. Stop the boat and drift over these edges specifically.
The “Holding Zone” or Bait Cloud
Look for the “bait cloud”—a fuzzy, irregular mass of small dots usually hovering 20 to 50 feet off the bottom. This isn’t just a sign of food; it’s a sign of oxygen and current. In Hawaii, the current is king. Fish often position themselves on the *down-current side* of a pinnacle or rock outcropping to ambush bait being swept past. When you see a bait cloud on your screen, don’t cast into the center. Instead, mark the down-current edge of the structure and fish there. The larger marks—the hook-shaped arches—will usually be sitting just beneath or on the perimeter of that bait mass.
Choosing the Right Frequency and Cone Angle
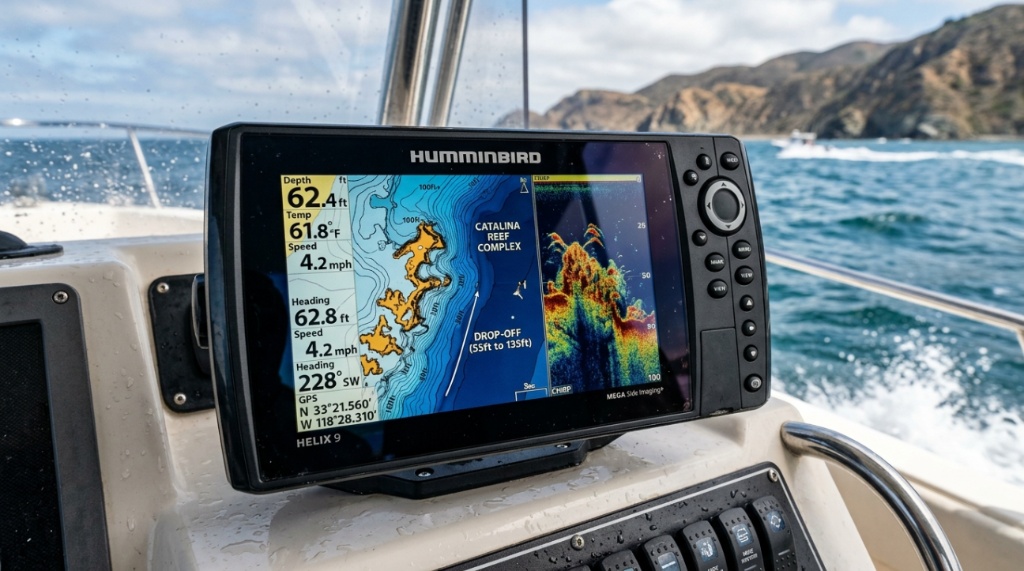
This is where technical knowledge pays off. Most combo units offer a 50/200 kHz option. In Hawaii, the 200 kHz (which gives a narrow 12–20 degree cone) is excellent for depths up to 300 feet. It gives you high resolution and better target separation. The 50 kHz (wide cone) is generally too loose for bottom fishing, but it can be useful for trolling for ono or mahi-mahi when you want to see big schools of aku (skipjack tuna) suspended high in the water column.
If you have a unit capable of CHIRP (Compressed High-Intensity Radiated Pulse), use a medium or high CHIRP setting. Medium CHIRP (80–160 kHz) is arguably the best all-around choice for Hawaiian bottomfishing. It provides a balance of target separation and depth capability, allowing you to see a single fish sitting within 2 feet of the rocky bottom, which standard 200 kHz often misses at depths beyond 150 feet, Before heading out onto the water to test your new electronics, make sure your gear stays protected against heavy ocean spray by choosing a reliable bag Keep Gear Dry with a Waterproof Fishing Backpack.
Using DownScan and SideScan for Maximum Coverage
2D sonar is great for seeing directly under the boat, but if you are prospecting for new fishing spots, you are blind to what is beside you. This is why SideScan is essential for Hawaii.
Finding New Spots with SideScan
When you are looking for a new bottomfishing spot, run SideScan in water between 100 and 250 feet deep. The key is to look for “shadows.” A rock or ledge that stands up off the bottom will cast a sonar shadow—an area of blank screen behind it. These shadows tell you the relative height of the structure. If you are looking for onaga, you want drop-offs that rise 10 to 20 feet off the bottom. If the image shows a flat, featureless expanse, keep moving. SideScan allows you to cover an entire reef line in minutes without disturbing the fish by motoring directly over them.
The Precision of DownScan
Once you spot a promising ledge on SideScan, don’t just drop a hook. Circle around and put the boat directly over the structure, then switch to DownScan. DownScan gives a photograph-like image of the bottom. This helps you identify if that “lump” is actually a coral head that will snag your gear, or a hard rock ledge with a clean overhang where fish like to hide. It clears up the “green blob” you see on regular 2D sonar into a distinct shape.
Step-by-Step: Setting Up for Deep Water Drift Fishing
Drift fishing is the most common method for bottomfish in Hawaii. To maximize your efficiency, follow this workflow before you drop a line:
- Set the depth range: Manually set the max depth to 1.2x the water depth you are drifting over. If you see 200 feet, set the unit to 240 feet. This maximizes screen resolution.
- Adjust the gain (sensitivity): Turn the gain up until you see “noise” or speckling on the screen, then back it off 5%. You want it hot enough to see bait, but not so hot that the screen is a mess.
- Enable Bottom Lock: If your unit has it, turn on “Bottom Lock” or “Bottom Zoom.” This takes the bottom 30 feet of the water column and stretches it across the entire screen.
- Mute the ping (optional): When you are anchored or drifting over a spot you intend to fish, some advanced units allow you to adjust the “Ping Speed” to Fast. This updates the screen faster so you can see your bait or jig descending in real-time.
Common Mistakes Anglers Make with Sonar
Even with expensive fish finders, many anglers leave the water empty-handed due to a few repeated errors.
- Ignoring the “Big” fish in the “Dead” zone: Many anglers focus on the mid-water column. In Hawaii, big ulua and jacks often sit *on* the bottom, right in the “hard echo.” Most novices see the thick red line and assume it’s just “rock,” but there is often a fish mark hidden within that red line. Look for a slight break or a brighter white spot within the bottom signal.
- Moving too fast: You cannot mark fish while trolling at 8 knots and expect to see individual bottomfish. To see fish, you must be moving at under 4 knots, ideally drifting at 1–2 knots with the current.
- Assuming all arches are fish: A classic “arch” can also be a weed ball, a jellyfish, or a rock. A true fish arch in 2D sonar has a distinct “hump” that is usually taller than it is wide. A bait ball is a cloud, not individual arches.
How to Use Sonar When Trolling (Pelagics)
When trolling for mahi-mahi, ono, or ahi, your approach to sonar changes entirely. You are no longer looking at the bottom. Look at the depth range between 30 and 100 feet. These fish often suspend near “current lines” or “weed lines.” You can see these on your screen as a faint line of scattered dots. Also, pay attention to the temperature gauge on your fish finder. Pacific blue marlin and ahi are sensitive to temperature breaks. If you see the water temp spike or drop by 2 degrees on your display, slow your troll and concentrate on that boundary zone. The sonar will often show larger bait congregations along these thermoclines, and it is imperative to keep your lures in that exact zone.
Frequently Asked Questions
What is the best fish finder frequency for deep sea fishing in Hawaii?
For deep drops (300–600 feet), use a 50 kHz frequency or a Low CHIRP band to penetrate depth. For shallower bottomfishing (<300 feet), use 200 kHz or High CHIRP for better resolution and target separation.
Can I use a freshwater fish finder in saltwater?
Yes, but you must check the transducer. If the transducer is made of plastic, it is likely fine for saltwater, but you should rinse the unit and connections with fresh water after every trip. Ensure all connections are waterproof, as saltwater corrosion is the leading cause of failure.
Why is my fish finder not showing fish when I know they are there?
If the gain is set too low, you will miss fish hugging the bottom. Lower the frequency to widen the cone, or slow down your boat speed. Also, ensure the transducer is not in “Simulator” mode and that it is mounted below the water line without turbulence from the hull.
Is a 5-inch screen big enough for bottomfishing?
It is usable but not recommended. For Hawaiian bottomfishing, you need to see small marks within thick bottom echoes. A 7-inch screen or larger offers higher resolution and makes it significantly easier to distinguish a fish from a rock in deep water.
Do I need SideScan for fishing in Hawaii?
It is not mandatory for catching fish, but it is the most efficient tool for finding new ledges and structure without burning fuel. If you stick to known “honey holes,” you can rely solely on GPS and a standard 2D sonar.
Conclusion
Hawaii sonar fishing isn’t about having the most expensive equipment; it’s about understanding how to interpret the unique underwater terrain of the islands. Stop relying on auto-settings and start manually controlling your depth range and gain to isolate the bottom structure. Use SideScan to hunt down new ledges, then switch to 2D or DownScan to drift that structure with precision. Pay close attention to the “transition zones” between hard and soft bottom, and ensure your frequency matches the depth you are targeting. By mastering these sonar techniques, you’ll not only save time and fuel but significantly increase your hook-ups. Next time you head out to the fishing grounds, trust the returns on your screen, and you’ll be well on your way to landing that trophy catch.